
Yeah yeah yeah, I know, there are
millions pendants made from antique spoons and forks out there, but this one's special so shut up! Actually, I read some tutorials just to see exactly how to do specific steps and found they were either hard to find or lacking. Like one step would say "bend the handle into your desired shape" and I was all, "ok, just tried that and broke my pliers in half, got any more tips on how to properly bend a spoon?" or they're all about how to manipulate
sterling silver spoons and I'm like, "pshaw like I have the pocket change for a sterling silver spoon to screw up, all I can afford is silver-plated.' Woah, sorry, I swear that's not how I talk in real life, just inside my head. Anywho, moral of the story is I'm going to attempt to explain, in detail, exactly how I made this pendant. I don't have pictures of the pendant mid-creation unfortunately, so sorry about that. I always think about it then I get so into it I'm almost done before I snapped a single picture so you'll have to use your imagination. If there are any questions feel free to ask, although no one reads this so you'd be the first comment ever! Yay, go you
 |
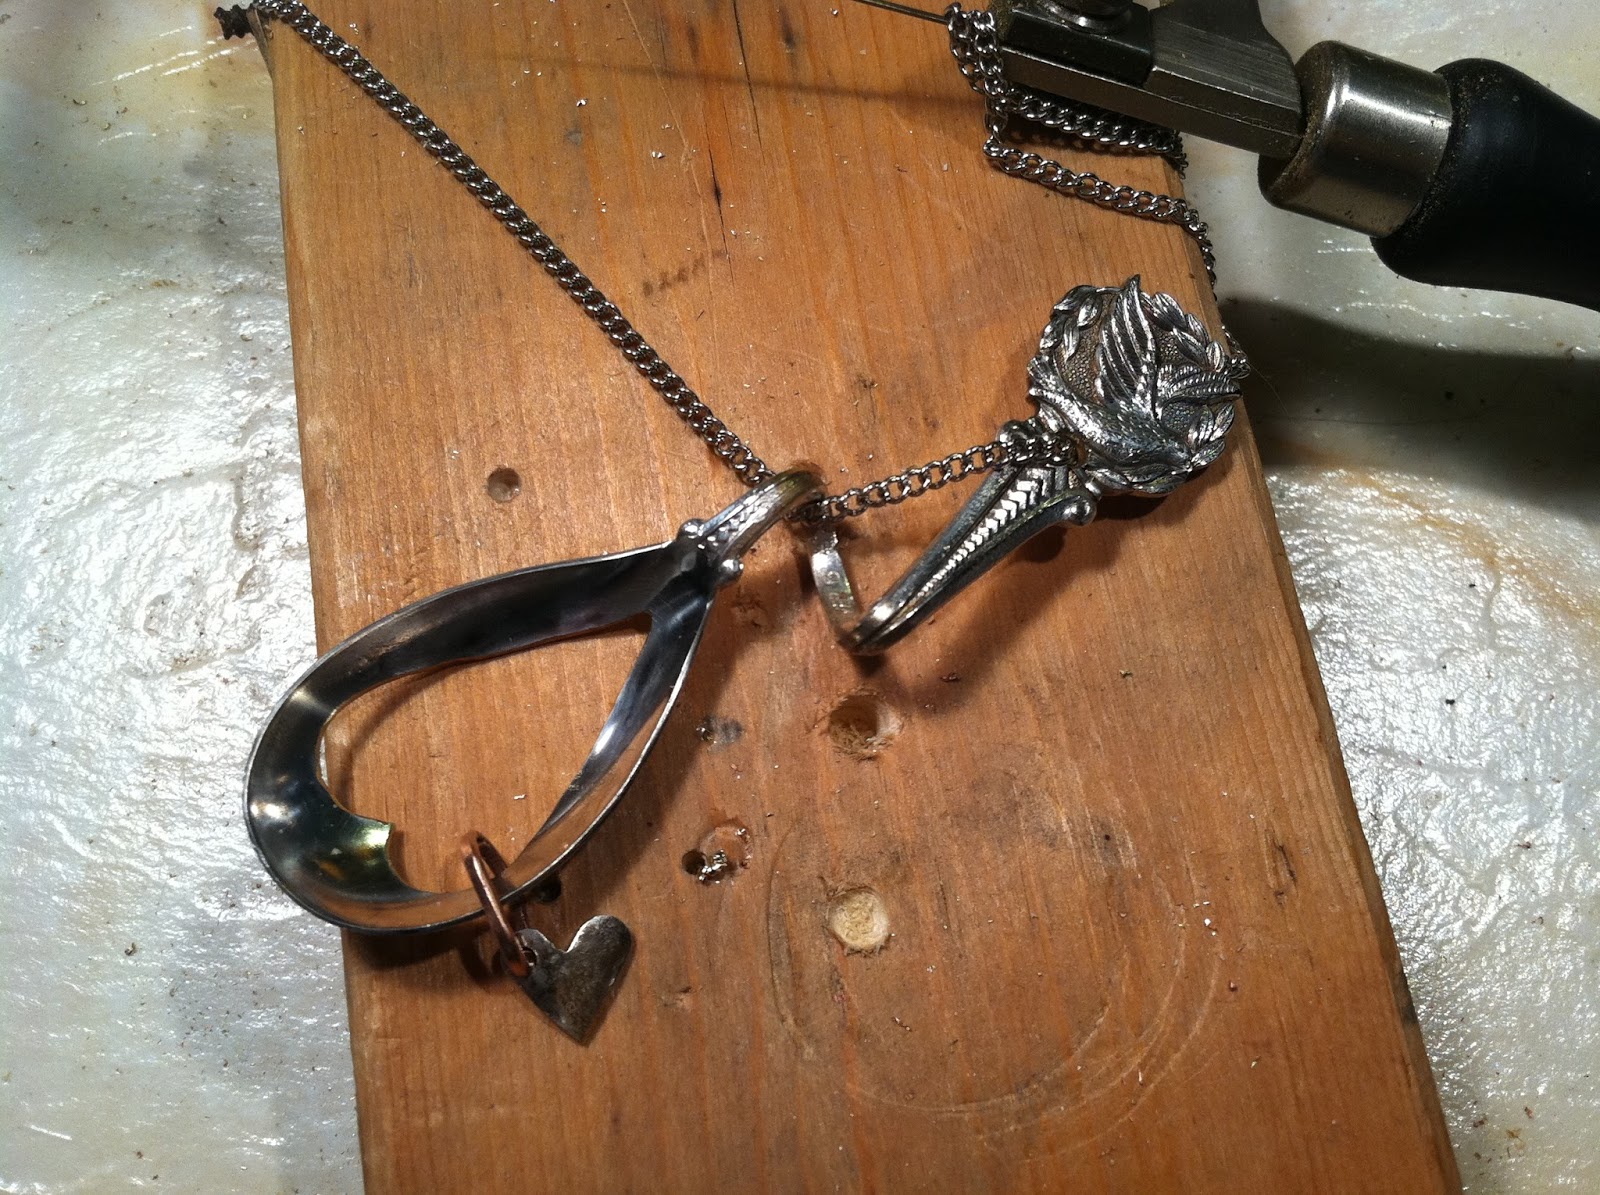
My poor broken cocktail fork, sacrificed
in the name of art |

- First, find your spoon. For this project I suggest one with a fairly narrow handle/neck and a large, not too deep bowl. This makes it easier to bend into the tight coil like this one is and also to cut out whatever shape you wish to cut from the bowl. I got mine from an antique store with a cornucopia of utensil, but you can find tons on ebay. I'd suggest buying some really cheap pieces to practice on, which I wish I had done before snapping this poor little cocktail fork in half on my first attempt :(
- Next, do some sketches to gauge what kind of shape your spoon will ultimately have. A great tip for doing this is to trace around your utensil onto some scrap paper as close to it's outline as possible. Then, cut it out so you have and exact copy of your spoons size and shape and know exactly how much neck you'll have to bend and shape. Otherwise you may over-estimate how much you have to work with and not end up with what you wanted in the first place. Not that little mistakes turn into cool pieces, but in my case it saves a lot of energy swearing and throwing the spoon across the room… which of course I would
never do.
- There are two main tasks in creating this piece: bending the neck and sawing out the shape in the bowl. I'd suggest sawing out the bowl before bending so that you'll have as close to a flat surface to saw. I used a sharpie to draw the shape of the heart and get the right proportions and size for the shape and size of the bowl. If you mess up some rubbing alcohol on a cotton ball easily removes the ink without damaging the metal.
- To saw your piece, you'll need to pierce a hole in which to insert your saw blade, unless your shape happens remove the rim. I used a pretty heavy duty drill bit in a hand-drill right in the middle of the heart. The closer to the edge of your shape the less sawing you'll ultimately have to do, but since this was my first time doing this exact procedure I left a lot of room for error in case the drill slipped and scratched the surface. Before drilling, use a center punch to make a divot that'll grab the bit and make it easier to drill.
- Once you have a hole, insert one end of your saw blade into your jeweler's hand saw and tighten the wing-nut, then insert the other end of the blade through the hole you made. Holding your saw so that the blade is perpendicular to the bowl (or as perpendicular as possible since the bowl is concave), put the blade end into the other wing-nut into the
 |
How to tension your saw blade (but
that's not me, I swear I'm not that
hairy) |
saw and tighten. I happen to have a saw with an adjustable tension screw, but if you don't press your saw into the edge of your table and tighten your blade so that when you release the saw it adds tension to your blade. Try holding your spoon so it's not adding any weight to your blade and taking away any tension. I used a heavier size blade for this part since spoon bowls tend to be fairly thick.
- Start sawing towards the edge of your shape, making sure to ease into any curves. Unless you're very adept at sawing, err on the cautious side and cut slightly inside the edge so you can just file the extra metal when you're finished. It's always easier to remove too much material than to put it back… in fact it's impossible to put it back. Slowly and steadily cut out your shape. Hold your saw perpendicular to the surface you're sawing through, use your should and not your wrist, and don't move your saw too much unless you're in a particularly tight shape. It's best to move the piece you're sawing into the blade of your saw rather than holding the spoon still and moving the saw around. Think of it as using a sewing machine. You move the fabric into the path of the needle and not the other way around.
- Once you've finished sawing out your piece, release one end of your blade and remove your saw. The edges will probably be jagged and sharp, so file the edges using a half-round or round file for the majority of the shape. To get a sharp point on the bottom of my heart I used a triangle file making sure not to cut too deep into the surrounding sides. You can also further soften the edges using sandpaper, but I didn't see a need to. Since the edges are inside the spoon they don't come in contact with your skin or clothing and so they don't have to be too perfect.
- An easier and quicker way to remove the material inside the spoon is to use a dremel or any flex-shaft tool like a foredoom (but those are crazy expensive and I can only afford one in my dreams). The dremel piece you'd use in this case is a tungsten carbide cutter, which comes in
 |
The Dremel tungsten
carbide cutter I use |
several shapes and sizes that you can find on the dremel website. I own this one that does a good job cutting and carving through metals of many hardnesses, thicknesses, and material. You need to start out by drilling a hole as if you're sawing, but you need to use larger and larger drill bits, working your way up to a pretty big hole. With these attachments you're supposed to start with a hole at least twice the diameter of the tip of the cutter, which I alway do… right? Anyway, I didn't use this method because I wanted a little material to make the little heart charm hanging from the spoon bowl and the tungsten cutter turns the metal you've removed into dust. I suppose you could cut around the inside of the bowl, but most spoons small enough to wear as a pendant wouldn't have enough material to actually do this. You'll most likely end up with a slightly cruder shape so you will have to file more material to get your exact shape, especially if you have any points. There are some tungsten cutting bits small enough for decent detail, but it's just safer to file since you have a lot more control.
- Once you're happy with the inner shape you will bend the neck into whatever shape you'd like. Most spoons would be a little cumbersome to wear without bending the handle at least a little bit and it adds nice detail. I wanted my spoon to hang in a unique way, which is why I chose this particular loop. I destroyed some pliers on my first attempt to bend a handle, but I did use some Mickey Mouse pliers and heavier duty pliers may do the job, but they might also mar
 |
My loverly vice, which doesn't
actually suction all that well, but
it's not that necessary for the
projects I use it for |
your metal, which I have a bad habit of doing. Instead I got a vice that suctions onto my workspace, but that's just because the edge of my counter is far too thick for a clamp-on vice which would be more secure and sturdy. It also has rubber jaw covers that protect whatever is being held and swivels and rotates so it'll hold my project in the exact-right position. I clamped the end of the spoon handle and bent the other part with my hands, no need for heavier-duty tools thanks to the vice. Depending on your intended shape you might need pliers to get the right loops and curls. Once I got the initial curve right, I use pliers to bend the exact shape I wanted. I chose this spoon because the neck was really narrow and pliable so getting the tight curve wasn't difficult. To get it even tighter I clamped the whole thing into the jaws of the vice and tightened it so smoosh it flatter. I wish I'd taken pictures mid-project to illustrate what I'm talking about because as I type this it's very obvious how unclear this particular part of the tutorial may be. Essentially, carefully manipulate your spoon handle into the shape you want using a vice or pliers or whatever get's the job done.
- Lastly, I drilled a 1/8" hole into the end of the spoon's handle so the chain would make the spoon hang in just the right way. Since I had the extra spoon bowl bit leftover I decided to make a little heart charm to hang off the bottom. I hadn't planned on doing this, but I'm glad I had just enough to make the baby heart. For this I used the tungsten carbide cutter to make the basic shape, filed it into the final shape and to soften the edges, and drilled a hole. I used some 16 gauge copper wire to make a jump ring and soldered it shut around the edge of the spoon bowl.
And voila! You've got yourself a spoon necklace. There are many different sizes and shapes of antique spoons out there to make a unique pendant of your own (read: don't copy my exact design you moocher!)
 Yeah yeah yeah, I know, there are millions pendants made from antique spoons and forks out there, but this one's special so shut up! Actually, I read some tutorials just to see exactly how to do specific steps and found they were either hard to find or lacking. Like one step would say "bend the handle into your desired shape" and I was all, "ok, just tried that and broke my pliers in half, got any more tips on how to properly bend a spoon?" or they're all about how to manipulate sterling silver spoons and I'm like, "pshaw like I have the pocket change for a sterling silver spoon to screw up, all I can afford is silver-plated.' Woah, sorry, I swear that's not how I talk in real life, just inside my head. Anywho, moral of the story is I'm going to attempt to explain, in detail, exactly how I made this pendant. I don't have pictures of the pendant mid-creation unfortunately, so sorry about that. I always think about it then I get so into it I'm almost done before I snapped a single picture so you'll have to use your imagination. If there are any questions feel free to ask, although no one reads this so you'd be the first comment ever! Yay, go you


No comments:
Post a Comment